![OSI SOLUTIONS FINAL JPEG-01[3].jpg](https://static.wixstatic.com/media/93bf49_ff276ec9c565489187349dc0b3af8ef9~mv2.jpg/v1/fill/w_150,h_182,al_c,q_80,usm_0.66_1.00_0.01,enc_avif,quality_auto/OSI%20SOLUTIONS%20FINAL%20JPEG-01%5B3%5D.jpg)


HOW TO SETUP VIRTUAL MACHINES ON MILITARIZED ZONE
- Hamizi Jamaluddin
- Oct 17, 2019
- 5 min read

Updated: Nov 1, 2019
today’s post we are going to continue building up our infrastructure. Hence we are going to start building up virtual machines on Militarized zone. Do note that the following virtual machines are setup in NUC 2.
Setup of DMZ-window 10:
Click create a new virtual machine
Tick typical and click next
Tick ‘I will install the operating system later’ and press next
Choose Microsoft window as guest operating system, windows 10 x64 as version then click next
Rename the virtual machine and click browse store the virtual machines in desired place.
Key in the capacity according to the infrastructure drafting and tick store virtual disk as a single file.
Click ‘Customize Hardware’
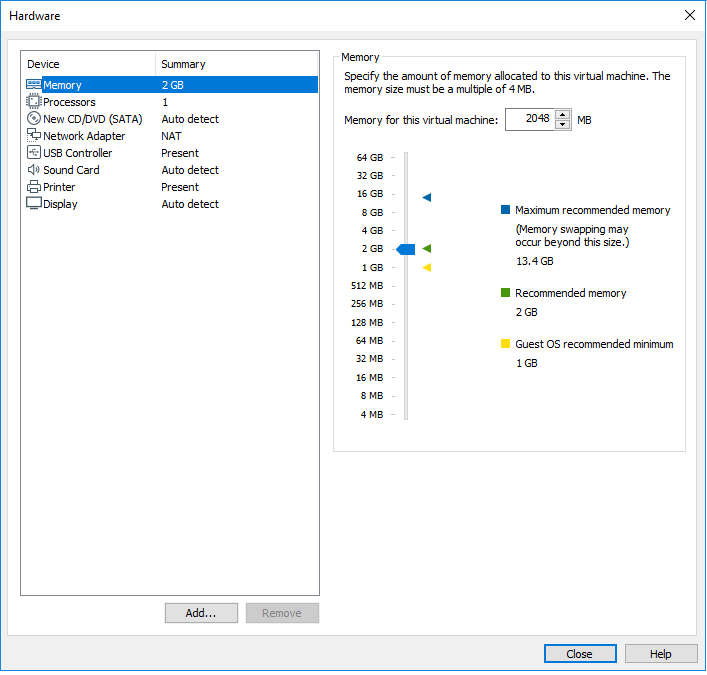
Change the memory to 2GB (2048MB in binary)
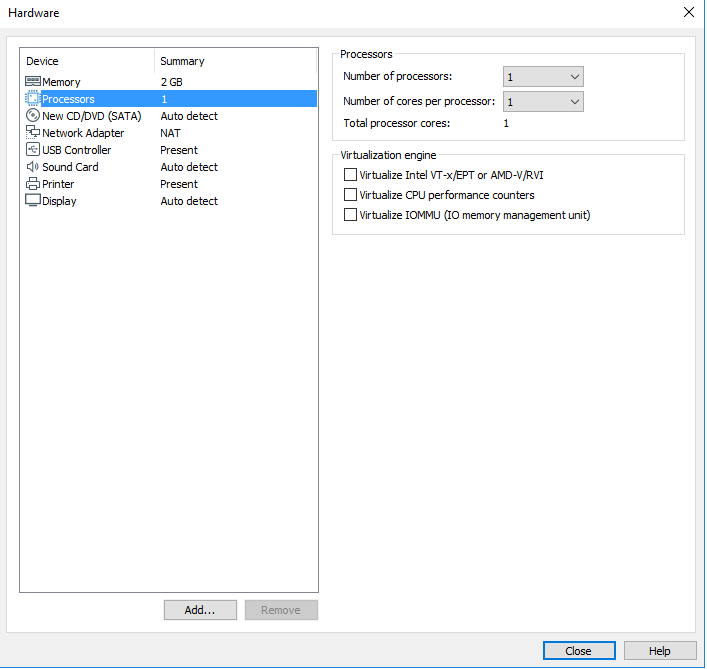
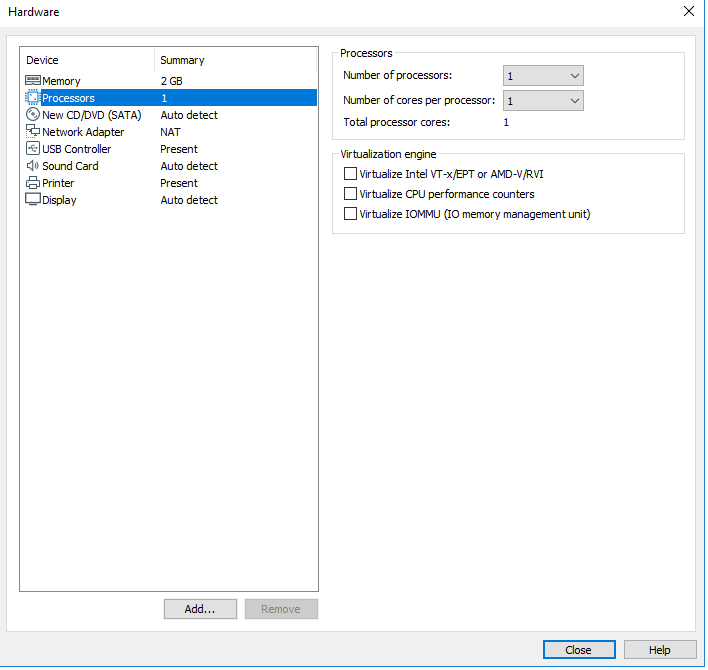
Change the processors to 1
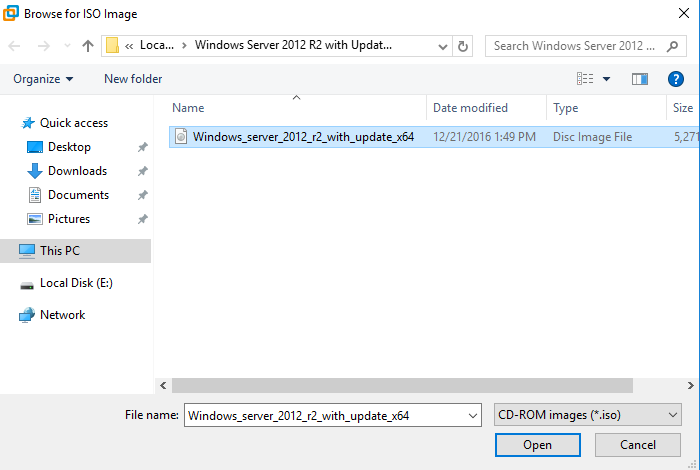
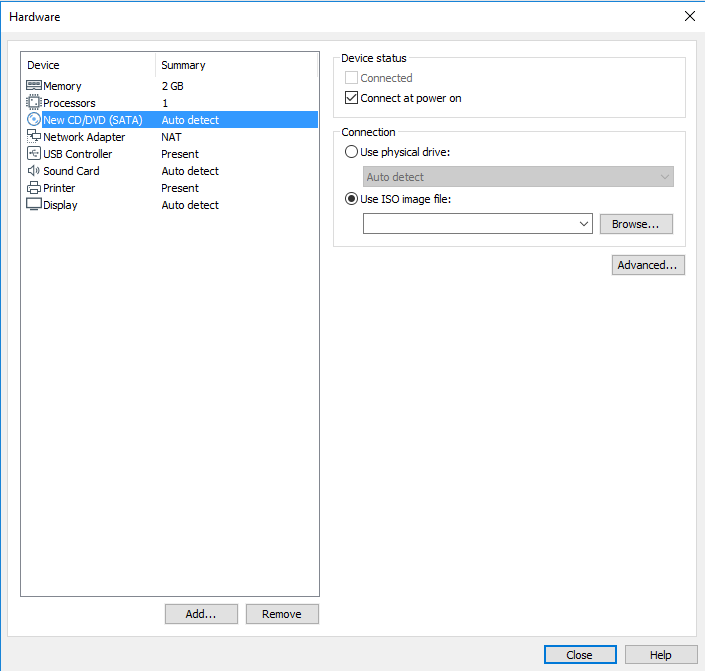
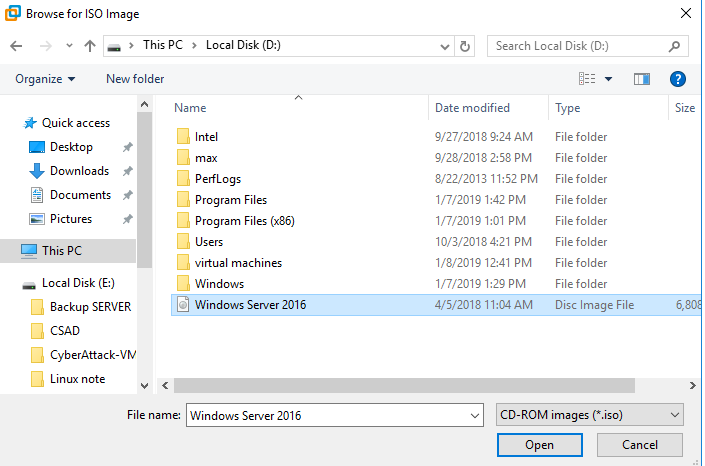
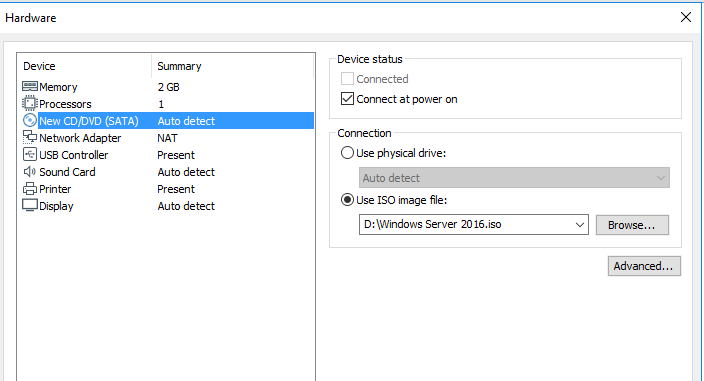
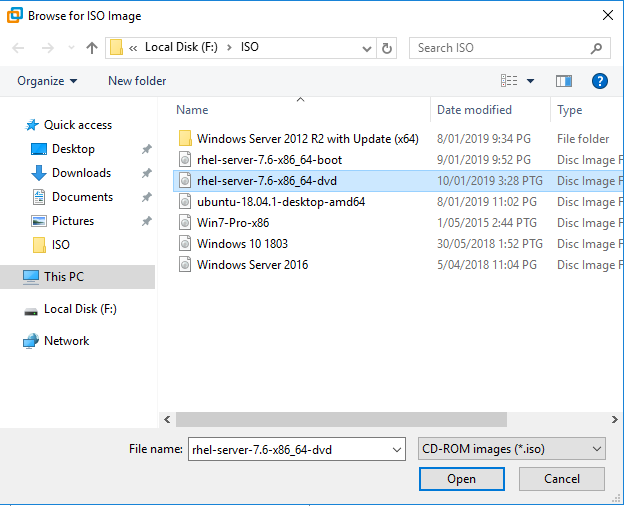
Click browse to search for the ISO image for windows 10.
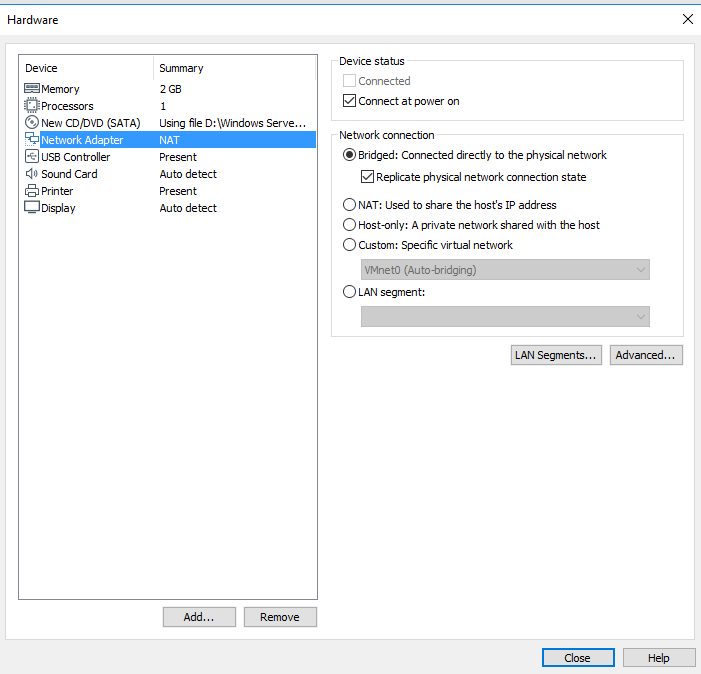
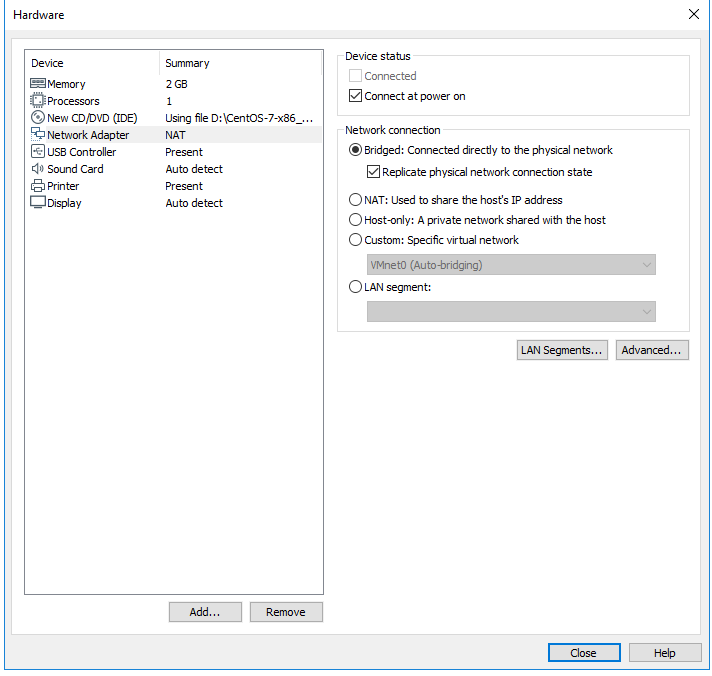
Change network adapter to bridge and tick replicate physical network connections that listed below it, after that click close
Click ‘Finish’
Click ‘Power on this virtual machine’
Click Next
Click Install now
Click ‘I don’t have a product key’
Choose Windows 10 Pro then press ‘Next’
Tick ‘I accept the license terms’ and press ‘Next’.
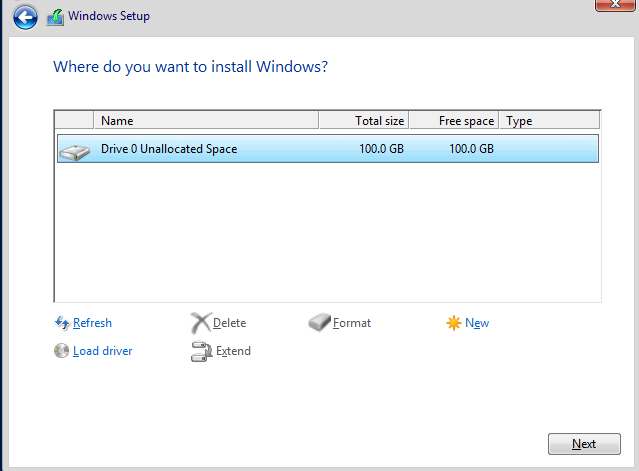
Choose ‘Custom: Install windows only (advanced)’
Click ‘Next’
choose Malaysia and click yes
click yes
click skip
choose set up for personal use then click next
Choose offline account at the bottom left
Click No
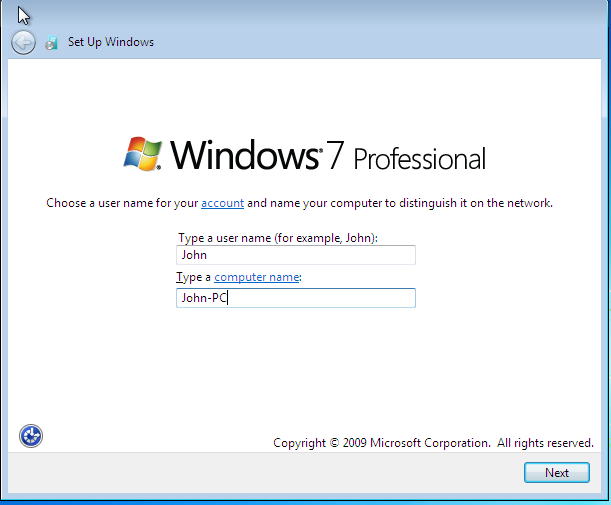
create an username then click next
key in a password then click next
Turn off for all option then click accept
When it is loaded, click on VM tab on the top and click install VMware Tools to install vmware tools.
Choose Run setup64.exe
Choose Yes
Click Next
Choose complete then click Next
Click Install
Click Finish
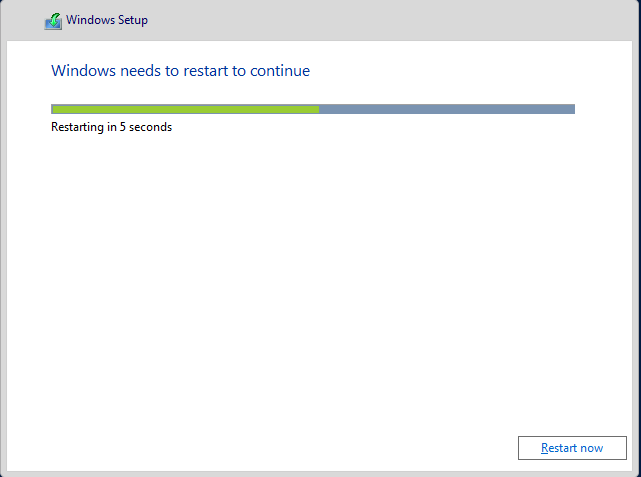
Click yes to restart
Setup of DMZ- window server 2012:
Click create a new virtual machine
Tick typical and click next
Tick ‘I will install the operating system later’ and press next
Renamed the virtual machine and choose the location to store the virtual machine then click Next
Key in 80GB for storage and tick store virtual disk as a single file, after that click next
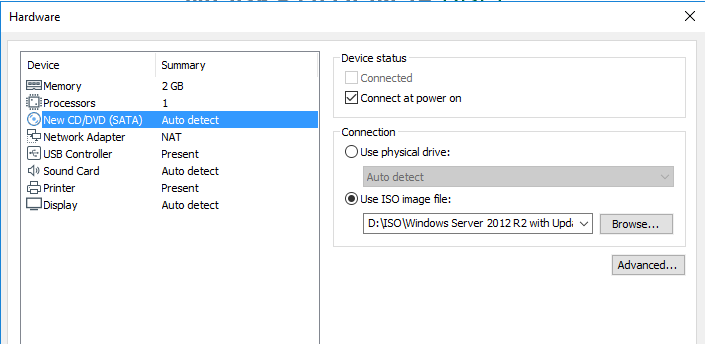
Click Customize hardware
Change the RAM to 2GB (2048MB in binary)
Change number of processor and core per processor to one


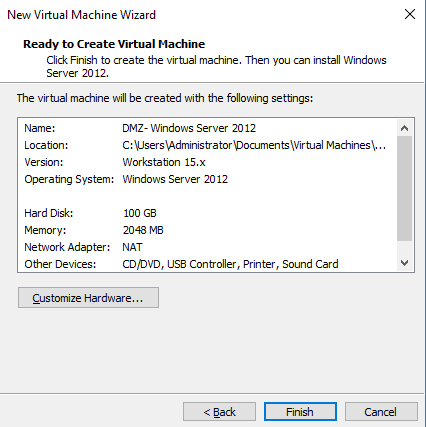
Click Finish
Click power on this virtual machine
Click next
Click install now
After key in the product key, click next
Choose server with GUI and click next
Tick “I accept….” And click Next

Click Next
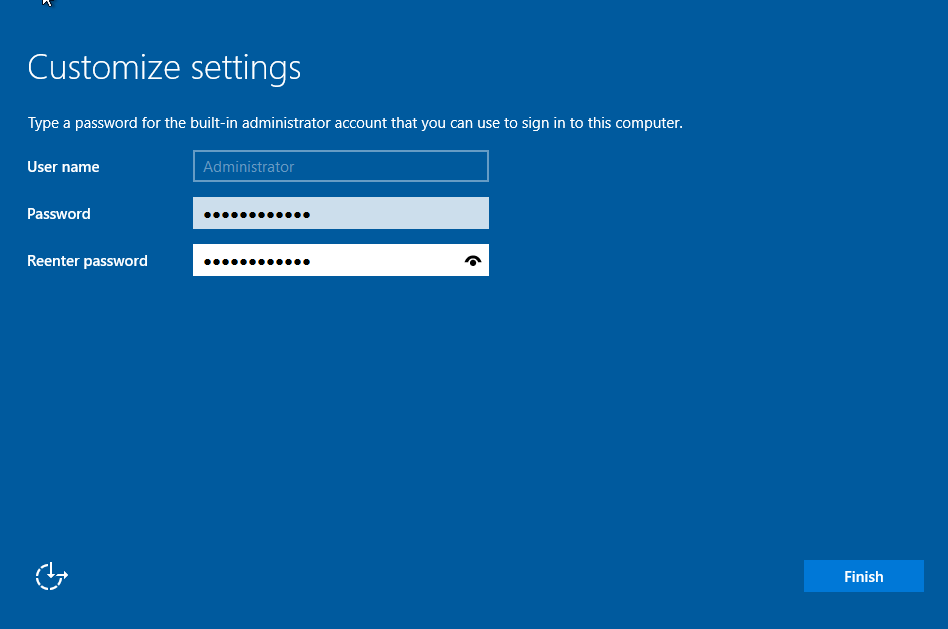
Create password the Administrator then click Finish to proceed
Click on the symbol above that is listed on the vmware tab is to send ctrl+alt+del to the virtual machine
Login as Administrator.
On the VM tab, click Install VMware tools to install vmware tools.
Click setup64.exe
Click Next
Click Complete then click Next
Click install
Click finish
Click yes to restart Installation of dmz-window server 2016:
Click create a new virtual machine
Tick typical (recommended) then click next
Tick I will install this operating system later and click next
Choose the guest operating system and version accordingly then click next
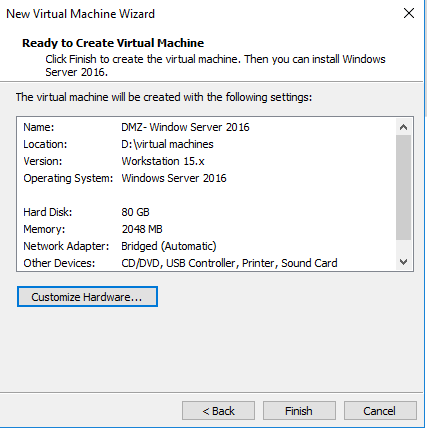
Renamed the virtual machines, choose the stored location then click next
Key in 80GB, tick store virtual disk as a single file ten click next
Click customize hardware


Click power on this virtual machines
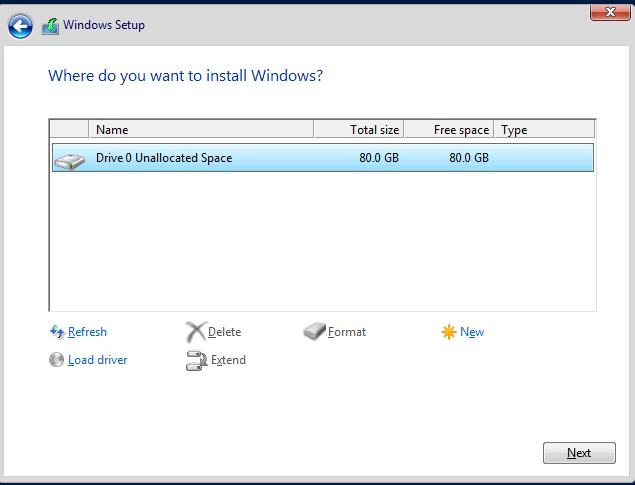
Click any key quickly to boot from ISO image
Click next
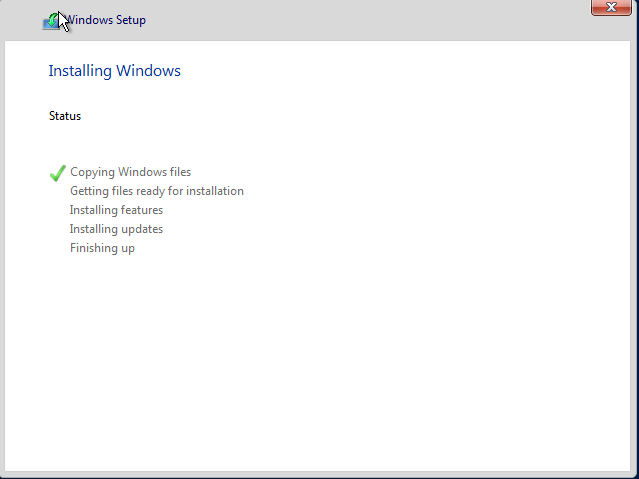
Click Install now
Choose standard evaluation (desktop experience) then click Next.
Tick I accept the license terms then click next


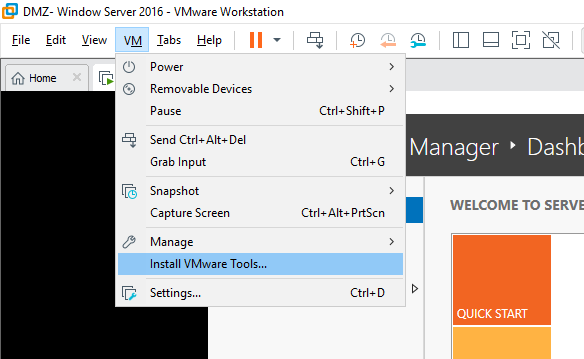
On the VM tab, click Install VMware tools to install vmware tools.
Click Run setup6.exe
Click Next
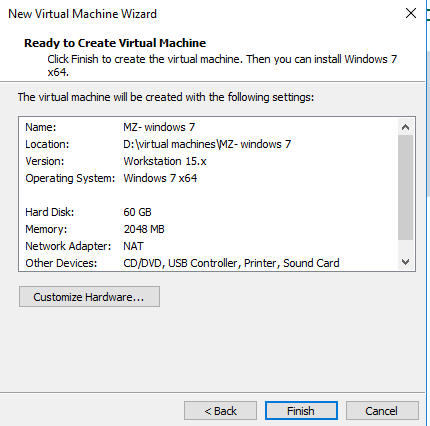
Click Complete Setup of MZ-windows 7:
Click create a new virtual machine
Choose typical(recommended) then click next
Tick I will install the operating system later then click next
Choose Unix for guest OS and choose window 7 64bit for the version, after that click next
Rename the virtual machine, click browse to choose a path to store the virtual machine then click next
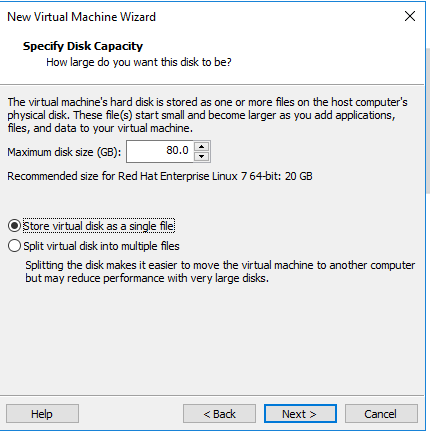
Key in 60GB, tick store virtual disk as a single file
Click customize hardware


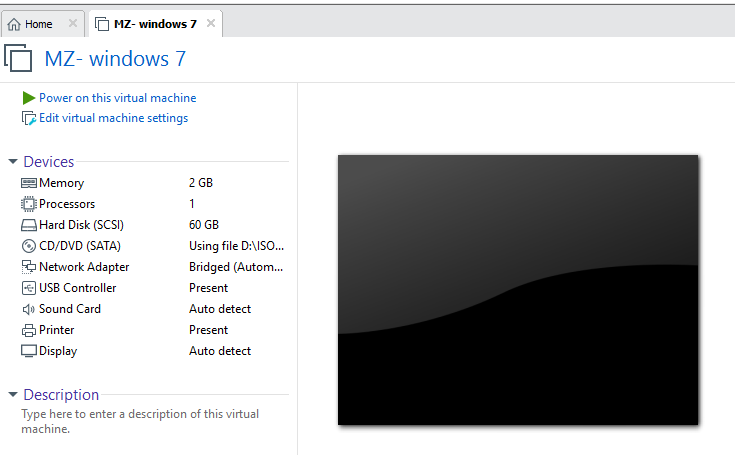
Click power on this virtual machine
Click Next
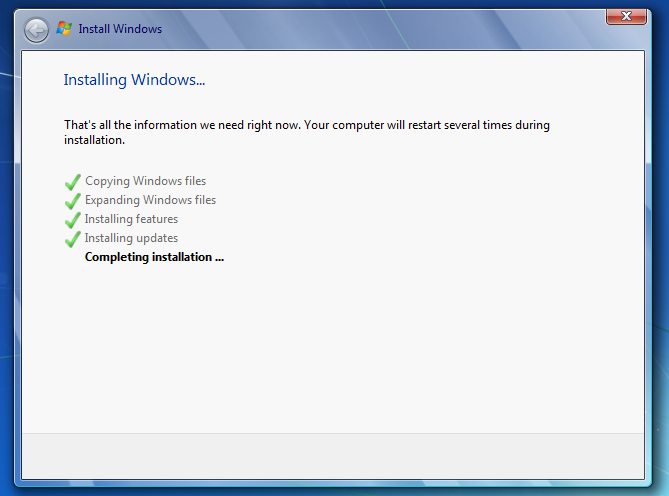
click install of window 7
Tick I accept the licnese term and click next
Click custom
Click next


Register a user, type a computer name then click next
Create a password for user created then click next
Click next
Click ask me later
Choose date and time


pick home network
click home network


Click and check update
Tick I accept the term then click finish
Click restart now
Click update to window 7 (SP1)
Click install update to update window 7 virtual machine up to SP1
On the VM tab, cilck install Vmware tools to begin installation of Vmware tools
Click Run setup.exe
Click yes
Click yes
Tick complete then click next
click install
click finish
Click yes to restart
Setup of Red Hat Enterprise Linux 7.6:
Open chrome browser and search for red hat iso image, click on the first result
Click DVD ISO for RHEL x86_64 under all downloads tab
Remember to verify your account by clicking on the link send to the email that was key in during registration
Click create a new virtual machine
Tick typical (recomended) thne click next
Tick I will install the operating system later then click next


Choose Linux for guest operating system and linux 7 64-bit for version then click next
Renamed the virtual machine, choose a storage place then click next
Key in 80GB for capacity, tick store virtual disk as single file then click Next
Click Customize hardware


Set the RAM as 2GB (2048MB in binary)
Change the processors and number of cores per processor to 1
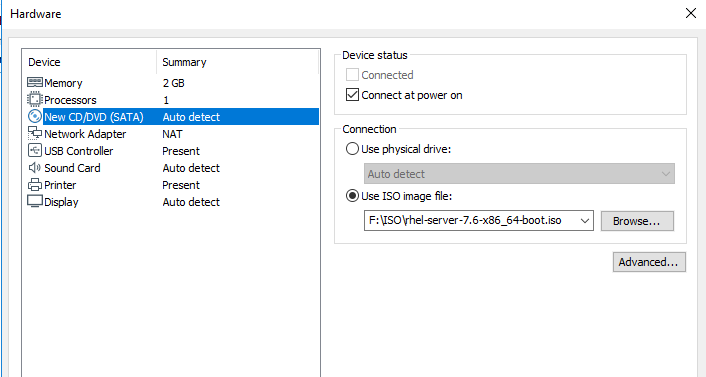
Tick use an ISO and and click browse to locate red hat ISO image.
Choose bridge adaptor and tick replicate physical network connection state
Click finish
Click power on this virtual machine
Press enter to intsall red hat enterprise linux 7.6
Click continue
Click date and time tab
Choose the region and city you are currently at, then clock done
Click installation destination
Click done
Click network and hostname tab
Turn the ethernet on then click done
Click begin installation on bottom right
Click root password tab
Set password for root
Click user creation tab
Create a user, then click done


click Reboot
Log in as root userHow to register and subscribe a system to the red hat customer portal to allow installation of services
Noticed that when trying to do yum update on a freshly install red hat 7.6 virtual machines, it will show the message “this system is not register with an rntitlement server...” and update is unable to execute
Open chrome browser and type red hat developer, click on the first result Register account as developer:
Key in your red hat account info to subscride to red hat developer program
After that back to you terminal, run the following command to register the system with your red hat accout: sudo subscription manager register
Run the following command: sudo subscription-manager attach --auto to attach any available subscription that matches the current system. After that will be able to run update and installation. That’s it for today post, I will start posting installation of services according to the infrastructure mapping according to the virtual machine respectively in demilitarized zone on my next post.


Comments