![OSI SOLUTIONS FINAL JPEG-01[3].jpg](https://static.wixstatic.com/media/93bf49_ff276ec9c565489187349dc0b3af8ef9~mv2.jpg/v1/fill/w_150,h_182,al_c,q_80,usm_0.66_1.00_0.01,enc_avif,quality_auto/OSI%20SOLUTIONS%20FINAL%20JPEG-01%5B3%5D.jpg)


Simple step to create a Group using Windows Powershell in Server 2012
- Hamizi Jamaluddin
- Jul 25, 2019
- 1 min read

Updated: Aug 2, 2019
In my previous post, I posted a step to create AD user account using Windows PowerShell, now i going to show you how to create a AD group using Windows Powershell in this simple step.
1 - as usual, open your Windows Powershell (please identify where you going to place your new group, for this demo I will create a MelakaBranchUsers group in MelakaBranch OU)


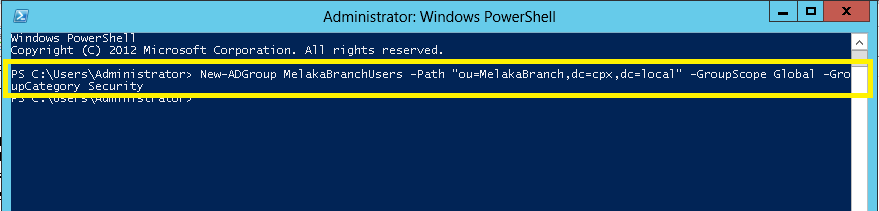
2 - in PowerShell, please type New-ADGroup MelakaBranchUsers -Path "ou=MelakaBranch,dc=cpx,dc=local" -GroupScope Global -GroupCategory Security and press Enter.
-- New-ADGroup MelakaBranchUsers = this command to create new Group call MelakaBranch
-- -Path "ou=MelakaBranch,dc=cpx,dc=local" = this command is location where you going to create the group
-- -GroupScope Global -GroupCategory Security = this command is where you choose global group scope and security group type
3 - Open Active Directory User and Computers, refresh the interface and your newly created MelakaBranchUser is appear.


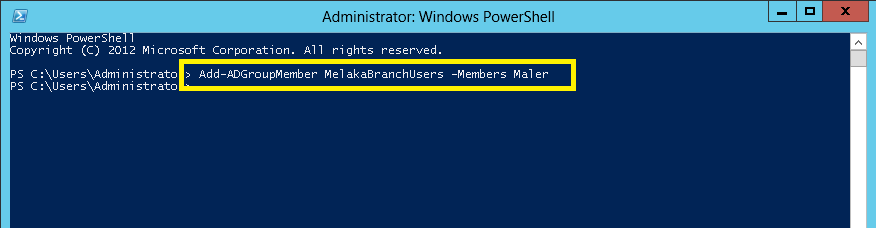
4 - Next, lets transfer our AD user Maler into this MelakaBranchUser group, in your PowerShell type Add-ADGroupMember MelakaBranchUsers -Members Maler and press Enter.
5 - Lastly, to check if Maler is in correct group we created just now or not, execute this command : Get-ADGroupMember MelakaBranchUsers


That's all for now.. my next post I will guide you all how to create AD user accounts in Bulk..


Comments