![OSI SOLUTIONS FINAL JPEG-01[3].jpg](https://static.wixstatic.com/media/93bf49_ff276ec9c565489187349dc0b3af8ef9~mv2.jpg/v1/fill/w_150,h_182,al_c,q_80,usm_0.66_1.00_0.01,enc_avif,quality_auto/OSI%20SOLUTIONS%20FINAL%20JPEG-01%5B3%5D.jpg)


Simple Step Deploy DHCP Services in Windows Server 2012
- Hamizi Jamaluddin
- Jul 25, 2019
- 3 min read

In my previous post, we play around with Windows Powershell, but this time, let try something common available in infrastructure, which is DHCP Server.
In this post, I'll go through a very simple step on how to deploy DHCP Services in Windows Server 2012 and let Windows 8 getting IP from this DHCP Server.
For this Demo, I'm using 3 Hyper-V Machine, which is my Previous domain Server (cpx.local), Member Server (mydhcpsvr.cpx.local) and Windows 8 Client.
I will install DHCP Services in Member Server machine which is mydhcpsvr.cpx.local.
Let get started...
1 - Let check my mydhcpsvr.cpx.local server and to confirm it join to domain.


2 - Next, on the same server, open Server Manager and click Tools to confirm we have no DHCP services installed.


3 - once you confirm that this particular server have no DHCP Services installed, please click Add roles and features and then click Next button on the next screen.


4- once you confirm that this particular server have no DHCP Services installed, please click Add roles and features and then click Next button on the next screen.


5 - On the Select destination server screen, confirm that you have selected "select a server from the server pool" and click Next..


6 - Next on the Select server roles, click DHCP button and click next to proceed..


7 - on the select features screen, just click next because we have no extra features to install at the moment.


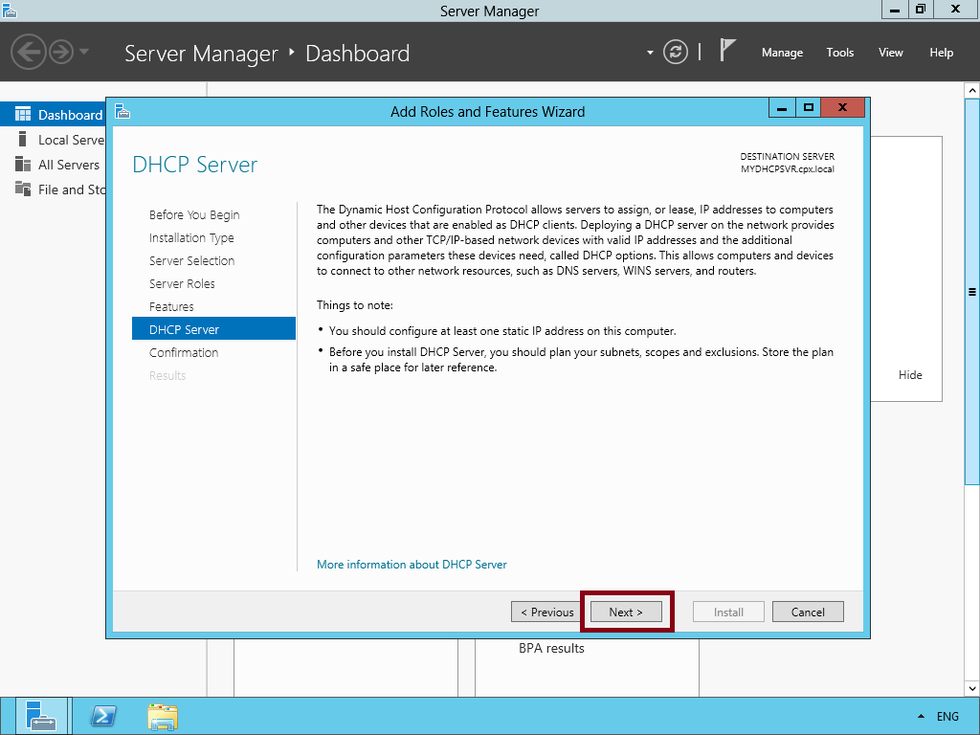
8 - on the DHCP Server screen, click next to proceed..

9 - on the Confirm installation selections, click Install..


10 - wait until installation successful and click close button..


11 - Next, open Server Manager and click Tools, you will see DHCP stated in the list, click the DHCP to open the console..


12 - Once your DHCP console open, verify your server name, in my case is mydhcpsvr.cpx.local, double click IPv4, and you will notice there is no scope available. No scope mean no IP address will distribute to our clients.


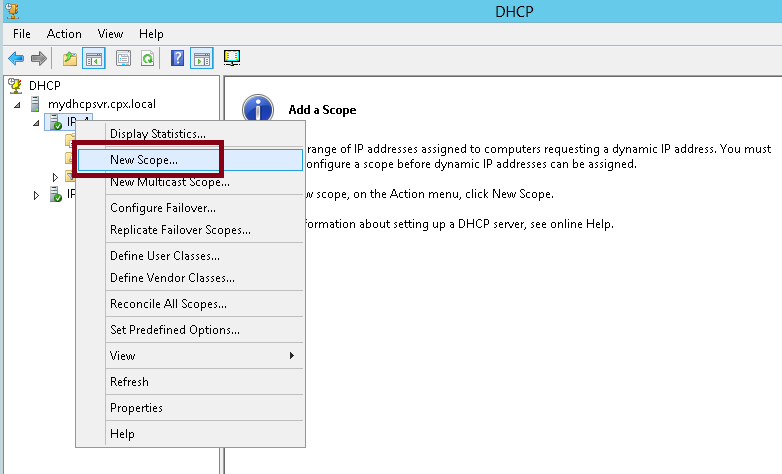
13 - Next, you need to create the scope so that later our Windows 8 client will get IP from this server. What you need to do, just right click IPv4, Click New Scope..

14 - Then click Next to proceed..


15 - On the Scope Name, enter any name you prefer just to help you identify the scope information. For this demo, I use MelakaBranch Office as my scope name.. then click next..


16 - On the IP Address Range screen, this is where you need to enter the range of IP for your clients, the IP you enter will distribute to client later.. for this demo I'm using 172.16.0.100 for my start IP until 172.16.0.200 for my last IP..


17 - on the Add Exclusions and Delay, I'm exclude 172.16.0.190 to 172.16.0.200, meaning 10 IP's will not be distribute to any clients. I will use this IP later..


18 - next, on the Lease Duration, I set 7 day, this is where you specify how long your clients can use an IP address from this scope.


19 - Next, On the Configure DHCP Options screen, click "Yes, I want to configure these options now".


20 - On the Router (Default Gateway) screen, you need to let the DHCP Server know what's your Default Gateway IP.


21 - Next on the Domain Name and DNS Servers screen, verify that Parent Domain automatically detect my domain name which is cpx.local and the IP itself..


22 - On the WINS Servers, just click next because I do not have any WINS Server running in my Infra..


23 - Next, on the Activate Scope screen, Verify that you choose Yes, I want to activate this scope now and click next.. then on the next screen, click Finish..


24 - On the DHCP Console, you will see your new scope now running and ready to distribute IP to clients..


25 - to verify the DHCP Server can distribute the IP from this server.. Turn on your Client.. and go to Local Area Connection Properties, double click TCP/IPv4 and make sure you choose Obtain an IP address automatically, same goes to Obtain DNS server address automatically.. and click OK..


26 - lastly.. open command prompt, and type ipconfig /all to verify that your machine is getting ip from DHCP Server that you just created..


** if it not getting any IP, type IPconfig /release and press enter then IPconfig /renew and press enter to get new IP..
that's all for now..


Comments