Simple Guide : How to “built” Active Directory in Windows Server 2012
- Hamizi Jamaluddin
- Jul 25, 2018
- 4 min read
As we all know, AD DS database stores information on user identity, computers, groups, services and resources.
AD DS domain controllers also host the service that authenticates user and computer accounts when they log on to the domain. Because AD DS stores information about all of the objects in the domain, and all users and computers must connect to AD DS domain controllers when signing into the network, AD DS is the primary means by which you can configure and manage user and computer accounts on your network.
So today, I will guide you on how to “built” @ deploy.. and my students always name this process as a “Installation of Active Directory in Windows Server 2012“.
For this Simple Guide, I’m using Core I5-3470 3.20Ghz proc & 3.8GB RAM, all the process using Hyper-V & private network.
Let’s get started..
1 – Double confirm the Windows Server 2012 that you are using still in Workgroup configuration.

2 – Change your Server IP to static IP, for this exercise I’m using IP class A which is 10.10.0.10 / subnet mask : 255.255.0.0 / Default Gateway : 10.10.0.1 / Preferred DNS : 10.10.0.10

3 – Open your Server Dashboard, click Add roles and features link @ you can also click menu Manage and choose Add roles and features to continue install ADDS roles (refer picture)


4 – once you click Add roles and features link/button, you will get Add roles and features Wizard dialogue box, here you just click Next button..

5 – after you click Next button, you will get Select installation type dialogue box, and here, double confirm that the Role-based or feature-based installation is selected(this setting is selected by default), and click next…

6 – on the next process, you will get Select destination server dialogue box, for this step make sure you click Select a server from the server pool. on this page also you can check & double confirm your Server name now is in Server pool.. and click Next..

7 – after you click Next, you will see a lot of Roles on the Select server rolesdialogue box, here make sure you click Active Directory Domain Services box, and Add features that are required for Active Directory Domain Services? will automatically pop up, then you just click Add features button to accept the default ADDS components..

8 – double confirm your selection which is Active Directory Domain Services, and click Next button..

9 – on the Select features, just click Next button..

10 – on the Active Directory Domain Services dialogue box, click Next..

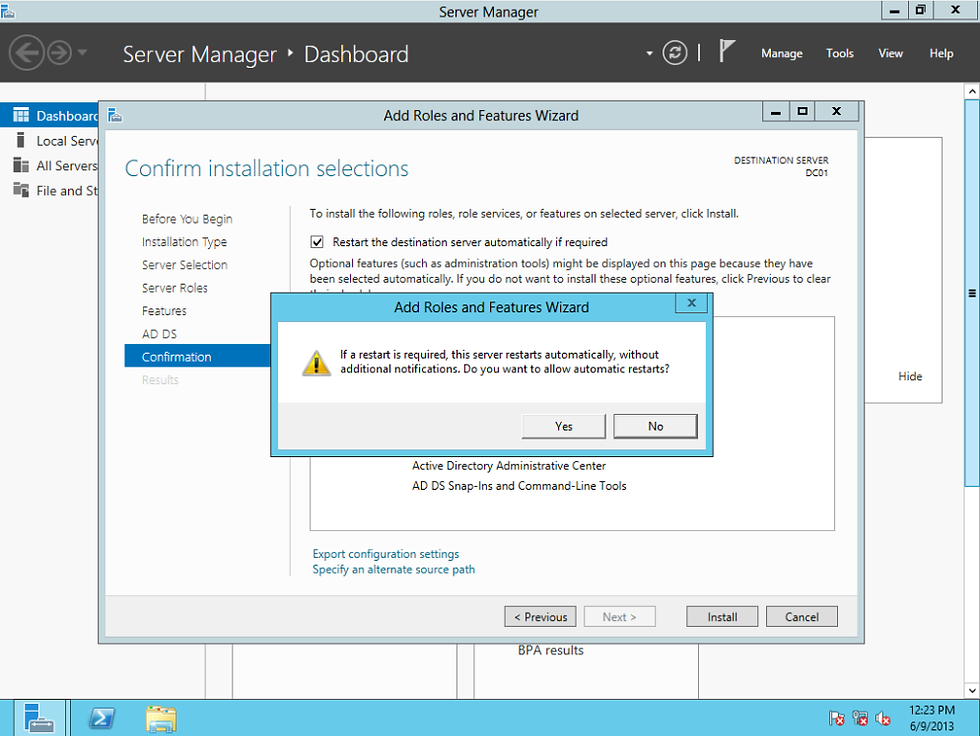
11 – once you click next, on the Confirm installation selections dialogue box, you can click Restart the destination server automatically if required & click Yes button and then click Install to proceed with installation of your 1st ADDS…


12 – Next, on the installation progress dialogue box, you just wait for few minutes for the ADDS installation to take place..

13 – once your ADDS installation done without any error, click Close

14 – Next, open your Server Dashboard, click on the yellow exclamation mark to open the drop menu.. here you have to click Promote this server to a domain controller link to start ADDS deployment..

15 – next, on the Deployment Configuration dialogue box, make sure you click Add a new forest button, this is because this Server is our very new server for our new domain. On the Root domain name, type your new domain name, for this example I’m using cpx.local.. and then click Next..

16 – on the Domain Controller Options, since this will be my new Infrastructure and all my existing server also running Server 2012, I just leave the Forest & Domain functional level as Windows Server 2012.. Under Specify domain controller capabilities, Domain Name System (DNS) server is selected by default (in case you have different DNS server, please un-tick the DNS box & make sure you change the preferred DNS IP address in the Network & Sharing Center point to your existing DNS server..). Under the Type the Directory Services Restore Mode (DSRM) password, key in any password that belong to Administrator and click Next.

17 – on the DNS options dialogue box, just click Next..

18 – on the Additional Options dialogue box, verify that your NetBIOS is pointing to your existing domain name.. and click Next..

19 – on the Paths dialogue box, you can just leave it the setting @ you can choose to point the ADDS database, log & sysvol file to different location.. and click Next..

20 – once you click next, you can review all your previous step & settings on the Review Options dialogue box.. if all correct click Next..

21 – on the Prerequisites Check dialogue box, you can see “All prerequisite check passed successfully. Click install to begin installation..” so just click Install button..

22 – if everything goes well.. you can see the AD installation progress is starting.. just wait for few minutes for the process to complete.. and your Server 2012 will auto reboot..

23 – after your Server 2012 reboot, you now can log in as a Domain Administrator..

24 – once you successfully log in, open your Server Dashboard and take few minutes to go open Active Directory Users & Computers and DNS Manager.. this is just to double check that all the installation is 100% successfully.


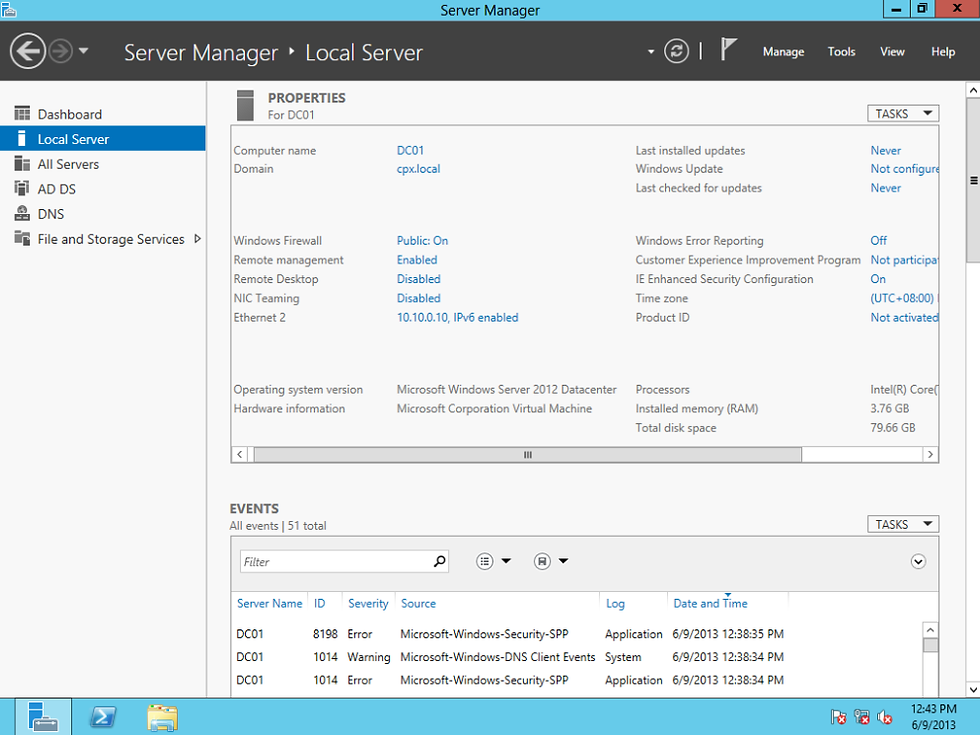
25 – Next, you can also double check your Server System Properties @ in your Local Server on the Dashboard, and see your full Server Info..


** Well.. we done for now.. but we still have bunch of things need to do such as High Availability Domain, Server Core.. DHCP..etc.. I will blog more in next few days.. c’ya…
![OSI SOLUTIONS FINAL JPEG-01[3].jpg](https://static.wixstatic.com/media/93bf49_ff276ec9c565489187349dc0b3af8ef9~mv2.jpg/v1/fill/w_150,h_182,al_c,q_80,usm_0.66_1.00_0.01,enc_avif,quality_auto/OSI%20SOLUTIONS%20FINAL%20JPEG-01%5B3%5D.jpg)


Comments